前言:
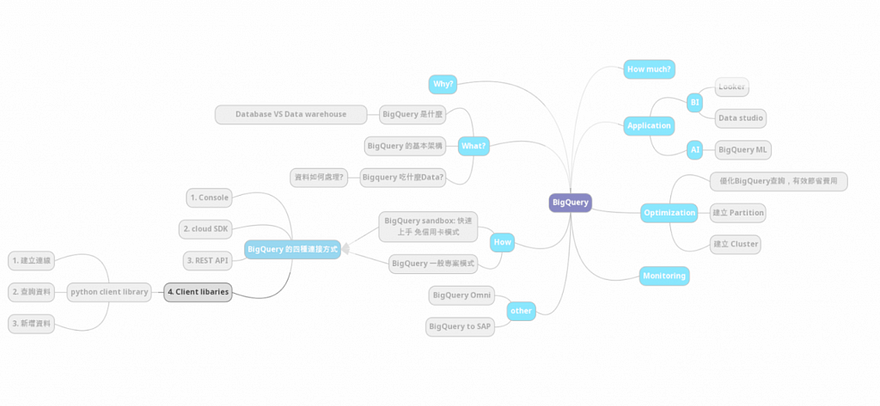
我們在前面介紹了 使用 Console、Cloud SDK 和 REST API 這些方法來和 BigQuery 溝通,這些方法很適合我們剛開始探索 BigQuery。但是從工程的角度而言,當我們有很多個 Data pipeline 要處理的時候,使用程式的方式能夠讓我們更方便去測試和維運,也就是使用 Client library。
接下來,我們要使用的是 python 的 client library。
準備材料:
Day 04 or Day 06
Cloud shell
Git 基本知識
完整程式:
Step 1. 開啟 cloud shell

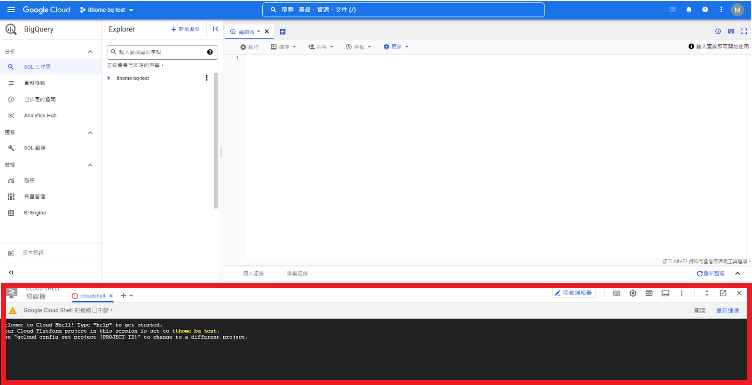
Step 2. 把專案 clone下來:
在 cloud shell,輸入以下指令:
git clone https://github.com/xscapex/BigQuery_ITHOME.git
點選 開啟編輯器
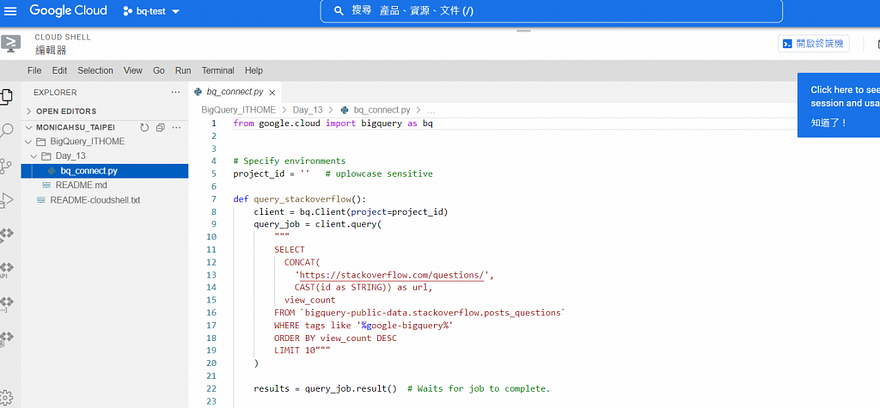
輸入 project_id

如果不知道自己的 project_id,在 cloud shell 輸入以下指令可以得到。
gcloud config get-value project
點選 開啟終端機,切回 cloud shell
Step 3. 輸入完 project_id後,執行 bq_connect.py
python ./BigQuery_ITHOME/Day_13/bq_connect.py
即可看到結果如下:

到這裡就完成使用 python client library 的範例囉!
完整程式代碼
from google.cloud import bigquery as bqproject_id = ” # uplowcase sensitivedef query_stackoverflow():
client = bq.Client(project=project_id)
query_job = client.query(
“””
SELECT
CONCAT(
‘https://stackoverflow.com/questions/’,
CAST(id as STRING)) as url,
view_count
FROM `bigquery-public-data.stackoverflow.posts_questions`
WHERE tags like ‘%google-bigquery%’
ORDER BY view_count DESC
LIMIT 10″””
) results = query_job.result() # Waits for job to complete. for row in results:
print(“{} : {} views”.format(row.url, row.view_count))if __name__ == “__main__”:
query_stackoverflow()
Summary:
今天示範的是在 cloud shell 上使用python client library,步驟如下:
Step 1. 開啟 cloud shell
Step 2. 把專案 clone下來
Step 3. 輸入完 project_id後,執行 bq_connect.py
Reference:
https://cloud.google.com/bigquery/docs/reference/libraries
https://github.com/xscapex/BigQuery_ITHOME/tree/main/Day_13
